
Now that I have a functioning terminal, I want to add it to my PiDP-11, but before doing that I want to verify the terminal and the converter module work. So I will connect that to a running Raspberry Pi first.
You cannot just connect a Raspberry Pi directly to a serial terminal. The Raspberry Pi pins use 3.3V and the terminal’s RS-232 interface can use voltages as high as 15V. A direct connection is sure to destroy something.
Obtain the Necessary Hardware
You can easily, and pretty inexpensively, get around this problem with a TTL to RS-232 converter. These are cheap and readily available. I purchased 5 on Amazon for $8:

This device needs to be powered by 5V but will supply 3.3V to the RPI’s pins.
This board uses a DB9 (9 pin) connector. Look at your terminal. If it is 9 Pin like this you are good to go. My terminal uses a 25 pin DB25 connector. You can convert with an adapter like this

Just make sure the genders for each side are what you need!
You are also probably going to want a cable. The TTL signal coming out of the RPI isn’t going to travel very far. That is part of the reason for RS-232’s existence. I ran RS-232 cables as far as 1000 feet way, way back in time. So while you are ordering the TTL to RS232 cable, pickup a serial cable as well.
Configure the Raspberry Pi
Before messing with hardware, set up your Raspberry Pi so the UART pins are active.
- Get into raspi-config:
sudo raspi-config
- Select interface Options:
3 Interface Options Configure connections to peripherals
- Select Serial Port Config:
P6 Serial Port Enable/disable shell messages on the serial connection
- Select YES for allowing a login shell:
Would you like a login shell to be accessible over serial?
- You should then see login and serial are both enabled as shown. Select OK, exit out and you will need to reboot to enable serial access.
The serial login shell is enabled
The serial interface is enabled
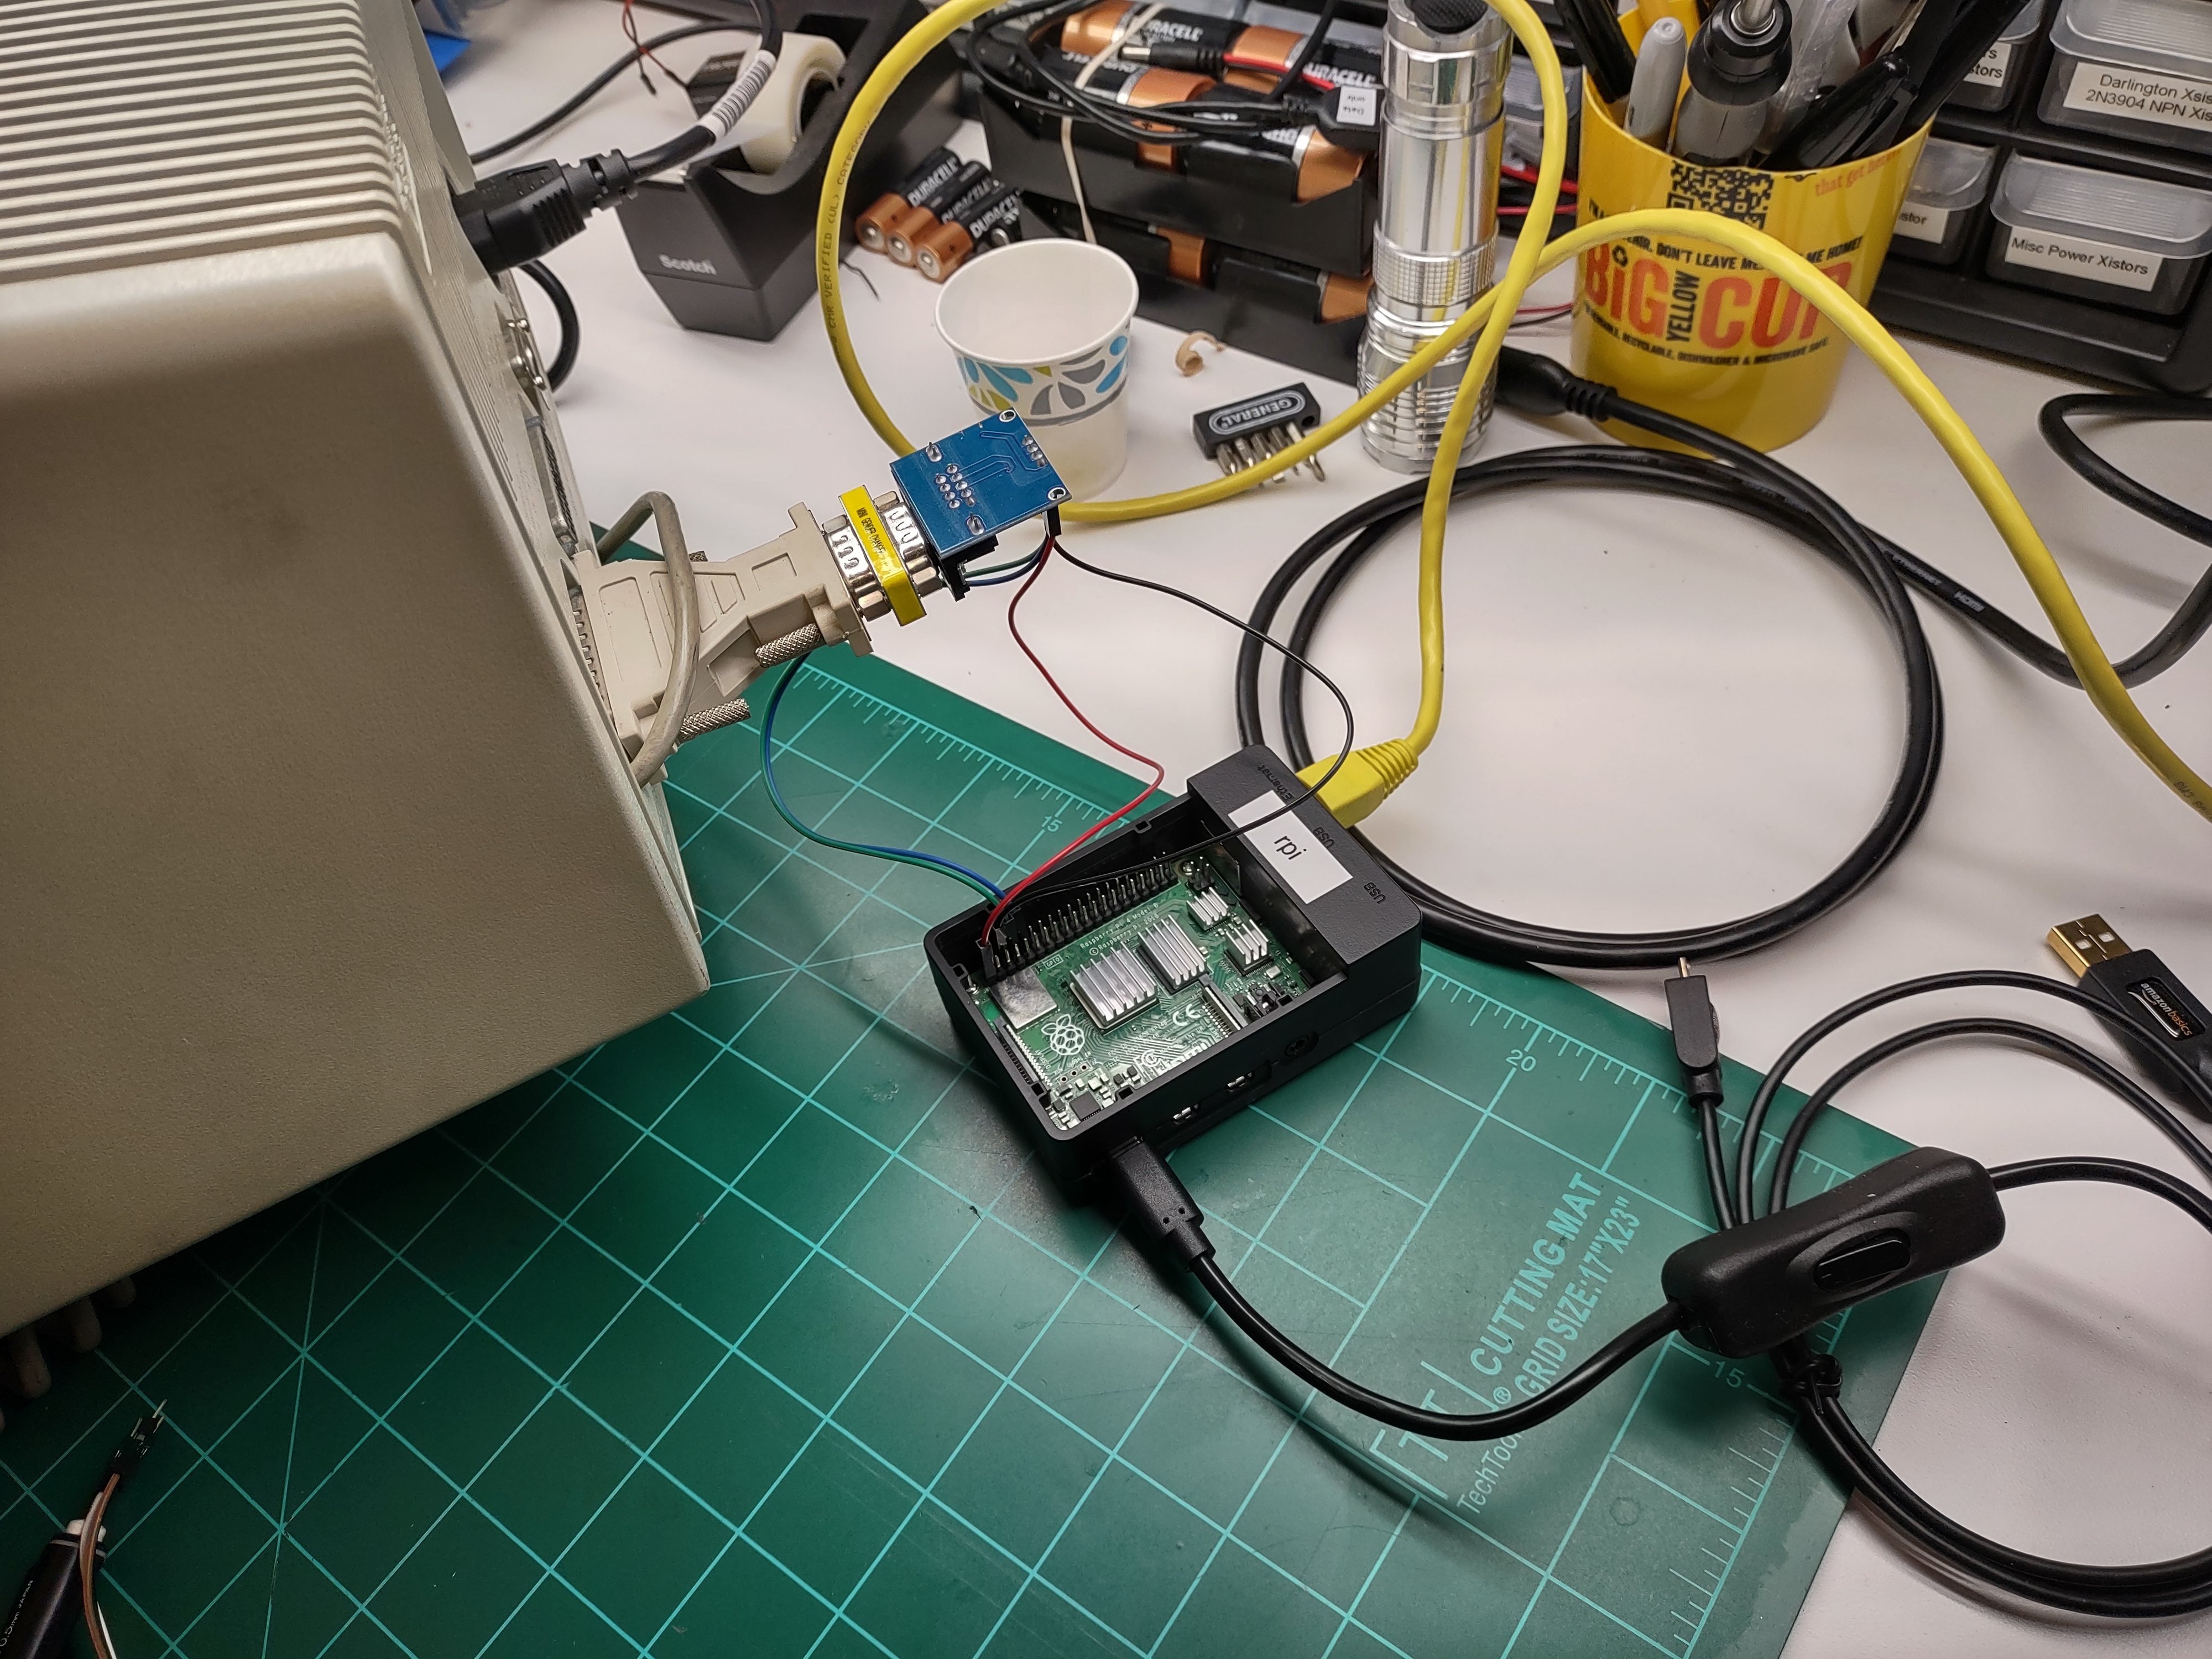
Connecting the Hardware
Here is how I wired everything together:

Connected together it looks like this:
Configuring the Terminal
You are going to want to configure your terminal to use 9600 baud, 8 bits, no parity, 1 stop bit. You can use other baud rates, but the terminal and the RPI must support the same speed. 9600 is ubiquitous, so start there, and move up to a faster speed later if you can.
If you have multiple ports on the terminal, make sure you are configured to use the one you intend. Also, if the terminal has a remote/local mode, make sure you are in remote (talking out the serial port).
Finally, set the terminal to emulate a DEC VT100 terminal if you can. This is why I chose an HP700/96 – I know it does a very good emulation.
Logging In to the Rasperry Pi
Start pressing RETURN on the keyboard. On an HP terminal, there is one RETURN key and several ENTER keys. They ARE NOT the same thing. Use only the RETURN key.
The Raspberry Pi does not speed sense the baud setting. Instead, it will cycle through 9600, 38400, and 115200 (if I recall correctly). While it is in the wrong baud rate, you will only see garbage displayed. Just keep pressing RETURN and it should get detected.
Here is my first connection. Note the garbage at the top – this was displayed while the RPI was trying to get the baud rate set properly.

Boy does that green screen look great!!!
Troubleshooting
The most common problem when setting up a serial connection like this is getting TX/RX in the correct order. If you don’t even see garabage when trying to connect, there’s a chance the signals are backwards. Try swapping the TX and RD pins at the TTL to RS-232 converter.
If you are not sure that your terminal is working and you want to rule out the Raspberry Pi and TTL/RS-232 converter, rather than connect to the terminal you can connect to your PC. If you have a serial port on the PC, just connect to that and use PuTTY on the PC to emulate a terminal.
If you don’t have a serial port on your PC, you could use a USB to Serial converter like this:

Since I had this laying around, I used it BEFORE the physical terminal to make sure the RPI and TTL/RS232 converter were set up properly. I didn’t have a lot of faith this terminal didn’t have issues. I’m glad I did so because it ended up I had configured the terminal incorrectly. So when it failed on the first attempt, I knew it had to be something about the terminal.
–
Now I know the terminal works and is properly configured and the TTL/RS-232 converter is also working properly. I can move this to the PiDP-11 system.
Update Dec 2022
I heard mention of people having issues with the TTL/RS232 module I used above. Evidently there are lots of bogus ones out there using a fake MAX3232 chip. So find a trustworthy vendor and if there is a problem, suspect the converter.
https://www.eevblog.com/forum/reviews/fake-max3232-any-additional-details/
and this is a great how-to on configuring/use the RPI UART
https://www.instructables.com/Raspberry-PI-3-Enable-Serial-Communications-to-Tty/


Came across this post and wanted to let you know, there’s other term types available aside from vt100. In fact, there’s HP specific term types you can set the serial console to so it’s not vt100 only, but native to your HP terminal.